
The key to a flawless 5-minute work look isn’t about using fewer products, but mastering strategic application for a finish that thrives under office lights and on camera.
- Color correcting specific areas is faster and more effective than applying layers of concealer.
- Cream textures offer a versatile, high-performance finish that works seamlessly on cheeks, lips, and even eyes.
Recommendation: Focus on professional techniques—like the ‘press and roll’ powder method—to elevate your quick routine from simple to sophisticated.
In the world of a busy professional, time is the ultimate luxury. The goal for your morning routine is maximum polish with minimum effort. Many believe the “no-makeup” look is about skimping on products, leading to a result that can feel incomplete or fade by your first coffee break. The common advice—a swipe of mascara and a dab of gloss—often fails to deliver the put-together, confident presence required for a day of high-stakes meetings and video calls. It’s not just about looking “natural”; it’s about looking sharp, credible, and awake.
The truth is, a truly effective minimalist look is an exercise in strategy, not scarcity. It relies on a deep understanding of texture science and precision placement. The secret isn’t a bare face; it’s a smartly engineered one. This approach moves beyond simply using less makeup and instead focuses on how specific products and techniques interact with your skin to create a durable, professional finish that looks just as good on a high-definition video call as it does across the boardroom table. This is about elevating your features in a way that feels authentic but performs with the reliability of a full-face application.
This guide will deconstruct the five-minute face, revealing the professional techniques that make all the difference. We will explore why certain products outperform others, how application methods can save you time while improving longevity, and how to address common skin concerns without caking on product. Prepare to transform your morning routine from a frantic rush into a deliberate, chic, and incredibly efficient ritual.
To navigate this expert guide, we’ve broken down the essential components of a flawless and fast professional look. The following sections will walk you through the key decisions and techniques that separate an amateur attempt from a celebrity-artist-approved finish.
Summary: Your Guide to a Polished 5-Minute Professional Face
- Why Peach Corrector Hides Dark Circles Better Than Heavy Concealer?
- Cream Blush or Tinted Balm: Which Works on Lips, Cheeks, and Lids?
- The Powder Mistake That Ages Your Face by 5 Years
- Which Step First: Brows or Complexion for a Natural Look?
- Problem & Solution: Applying Foundation With Fingers vs Sponge for Speed
- Why Acne Shifts to the Chin and Jawline After Age 25?
- Why Empire Waists Often Make Apple Shapes Look Boxy?
- How to Manage Hormonal Acne in Your 30s Without Drying Out Aging Skin?
Why Peach Corrector Hides Dark Circles Better Than Heavy Concealer?
The biggest time-waster in a morning routine is trying to mask dark circles with thick, heavy concealer. It’s a battle you can’t win with opacity alone. The professional secret isn’t more product; it’s smarter product based on color theory. Dark circles are typically blue or purple in tone. Instead of piling on a skin-toned concealer that can look gray and cakey, a peach-toned corrector works by neutralizing those cool tones. Peach sits opposite blue on the color wheel, effectively canceling out the darkness so that you need only the thinnest veil of a lightweight concealer on top, if any at all.
This technique is about precision, not plastering. By “micro-dosing” a tiny amount of corrector *only* on the darkest part of the under-eye area—usually the inner corner and the orbital hollow—you achieve a bright, rested look in seconds. A heavy concealer reflects light in a flat, uniform way, which can erase natural dimension and look obvious. A corrector, however, simply brings the discolored skin back to a neutral state, preserving your natural facial structure. It’s the difference between painting over a problem and truly solving it.
The result is an under-eye that looks naturally bright and smooth, without the risk of creasing or a heavy, textured finish that can actually draw more attention to the area. This is the cornerstone of an efficient routine: a single, targeted step that does the work of three, saving you precious minutes and product. The technique involves dabbing a lightweight concealer or the corrector itself onto the specific areas, focusing exclusively on the darkest points, and blending it well for a seamless finish using gentle patting motions with your ring finger.
Cream Blush or Tinted Balm: Which Works on Lips, Cheeks, and Lids?
For the ultimate 5-minute face, a multi-use color product is non-negotiable. It unifies the look and saves critical time. The debate often lands between a cream blush and a tinted balm. While both promise versatility, their performance, especially in a professional setting, differs significantly. A tinted balm is excellent for a sheer, hydrating wash of color on the lips, but its emollient formula often lacks the pigment and staying power for cheeks and lids. It can slide around, disappear quickly, and look greasy under office lighting or on a video call.
A cream blush, on the other hand, is the true workhorse. Formulated with more pigment and a satin or natural matte finish, it provides a healthy, lasting flush to the cheeks that can be built up or sheered out. This same texture adheres beautifully to the lips for a soft, stained effect and can be swept across the eyelids to add subtle definition and cohesion to the entire face. As celebrity makeup artist Lisa Eldridge advises, it’s about choosing the right texture for your skin: “Opt for a cream blush for normal to dry skin and a liquid texture for oilier skin.”

The application is foolproof and fast: use your fingertips to warm the product and press it onto the apples of your cheeks, blending upwards. The same finger can then tap the remaining color onto your lips and eyelids. The “digital-first” finish of a quality cream blush is also superior; its satin texture diffuses light softly on camera, providing definition without the distracting shine of a dewy balm. For a professional who needs their look to perform for 8+ hours, cream blush is the strategic choice.
This direct comparison shows why cream blush is the superior multi-tasker for a demanding professional environment. Its longevity and camera-friendly finish make it a much more reliable and efficient choice than a simple tinted balm.
| Aspect | Cream Blush | Tinted Balm |
|---|---|---|
| Application Speed | 45 seconds with finger-stamping | 30 seconds direct application |
| Longevity | Medium coverage with a natural finish for a healthy-looking glow lasting 8+ hours | Light coverage needing reapplication after 3-4 hours |
| Video Call Performance | Satin finish provides better definition on camera | Dewy finish can appear greasy under digital compression |
| Multi-use Capability | Works on cheeks, lips, and lids with buildable coverage | Best for lips, less pigmented on cheeks |
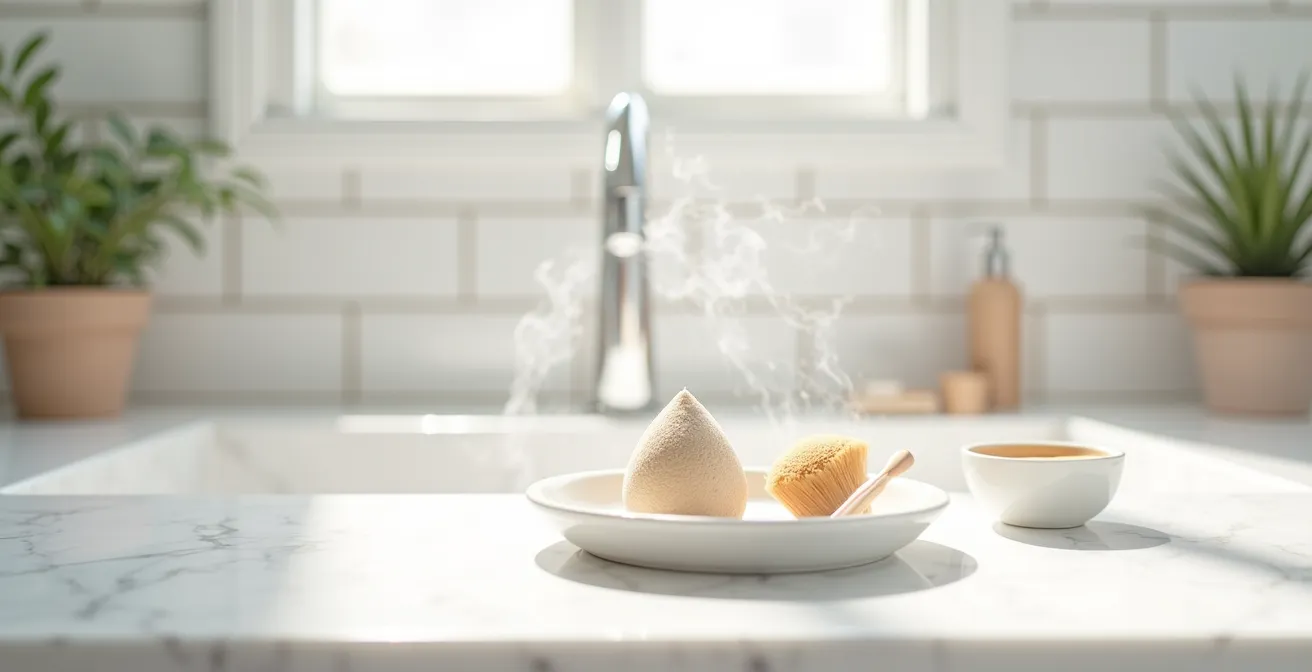
The Powder Mistake That Ages Your Face by 5 Years
Nothing shatters the illusion of a fresh, “no-makeup” look faster than incorrectly applied powder. The common mistake is to take a big, fluffy brush and swipe a heavy layer of powder all over the face. This single action can instantly add five years to your appearance. It settles into fine lines, dulls the skin’s natural luminosity, and creates a dry, dusty texture that looks flat and dated, especially under harsh office lighting. The goal of powder in a modern routine is not to mattify the entire face, but to strategically set specific areas while letting the rest of the skin’s natural finish shine through.
The professional solution is a technique shift: from swiping to the “press and roll” method. This involves using a powder puff or a dense brush to gently press the powder into the skin—primarily in the T-zone, under the eyes to set concealer, and around the nose—and then rolling it off. This technique locks your makeup in place for hours without depositing a visible layer of product. It controls shine where you need it while preserving the radiant finish of your cream products on the high points of your face, like the cheekbones.
As demonstrated by beauty expert Jennifer, this method is transformative. By pressing powder into the skin instead of swiping, she found this approach prevents the aging, dusty finish that traditional brushing creates, ensuring longer wear and a far more natural look. While some may feel pressure to wear makeup at work, it’s more about personal choice and confidence. In fact, according to recent workplace culture research, 75% of women don’t feel there’s an expectation to wear it. This makes the choice to wear makeup an act of empowerment, and doing it well is a skill.
Action Plan: Your 5-Point “No-Makeup” Look Audit
- Contact Points: List all areas where you apply product (e.g., under-eyes, T-zone, cheeks, brows, lips). Are you applying with purpose?
- Product Inventory: Review your current products. Are they the right textures (cream, liquid, powder) for your skin type and desired finish?
- Coherence Check: Confront your final look. Does it feel unified and harmonious, or like separate elements placed on the face?
- Memorability & Finish: Assess your look in different lighting (natural, office, video call). Does it look polished and fresh, or does it turn greasy or dusty?
- Integration Plan: Identify one new technique from this guide (e.g., ‘press and roll’ or peach corrector) to prioritize and incorporate into your routine this week.
Which Step First: Brows or Complexion for a Natural Look?
In a race against the clock, the order of operations matters immensely. The debate of “brows or complexion first” has a clear winner when efficiency is the goal. The answer is a hybrid approach, but you must start with the brows. Groomed eyebrows act as the frame for your entire face. Brushing them up and setting them in place with a clear or tinted gel instantly provides structure and lift, making you look more awake and polished before you’ve even touched your skin. This initial step often reveals you need far less complexion makeup than you think.
By defining the brows first, you create a strong focal point. This simple action—swiping a spoolie wand up and outward to shape your arches—makes the most significant visual impact for a “no-makeup” look. Once the frame is in place, you can then assess your complexion with a more strategic eye. You’ll be able to apply your tinted moisturizer or concealer with more precision, focusing only on areas that genuinely need evening out, such as around the nose or on specific blemishes.
After your complexion products are blended, you perform the final “hybrid” step: return to the brows with a fine-tipped pencil. With the rest of your face done, you can now see exactly where any sparse areas remain that need a few hair-like strokes for targeted definition. This two-part brow process is far more efficient than doing the entire brow at the beginning or end. It prevents you from overdoing the brow filler and ensures the final look is balanced, natural, and impeccably groomed. It’s a time-saving sequence that delivers a more refined result.
Problem & Solution: Applying Foundation With Fingers vs Sponge for Speed
The base is the foundation of your 5-minute face, and your application tool can make or break both your speed and your finish. Many professionals are devoted to their fingers, while others swear by a sponge. Both have pitfalls: fingers can leave a streaky finish, and sponges can soak up precious product. The solution lies in mastering the technique specific to your chosen tool for a flawless, speedy application.
If you prefer fingers for speed, the key is to warm the product (like a tinted moisturizer) on the back of your hand first. This makes it more fluid and easier to blend. Then, use a pat-and-press motion rather than a rubbing or swiping one. Patting melts the product seamlessly into the skin for a radiant, streak-free finish. For sponges, the common mistake is to get it too wet, which sheers out the product too much and wastes it. The pro-hack is the “half-damp” technique: instead of water, spritz the sponge with a setting spray. This dampens it just enough for a perfect sheer application while helping to grip the product and lock it in place for longer wear.
A third option, the dense brush, is best reserved for targeted coverage only in a 5-minute routine. Use it to stipple concealer over blemishes, then use the warmth of your ring finger to melt the edges and blend it into the skin. Each tool has a purpose, and matching the tool and technique to the problem you’re solving is the essence of an efficient, professional application.
| Problem | Tool | Solution Technique |
|---|---|---|
| Streaky finish with fingers | Fingers | Use your hands to smooth on tinted moisturizer for a radiant finish with pat-don’t-rub method, warming product on back of hand first |
| Product absorption with sponge | Damp sponge | Half-damp technique: spritz with setting spray instead of water for perfect sheer application |
| Time constraints | Dense brush | Use for targeted coverage on blemishes only, blend edges with ring finger warmth |
Why Acne Shifts to the Chin and Jawline After Age 25?
As women move into their late 20s and beyond, many notice a frustrating shift in their breakouts. The teenage acne that dotted the forehead and nose is often replaced by deeper, more persistent blemishes along the chin and jawline. This is not a coincidence; it’s a direct result of hormonal fluctuations. This area of the face is particularly rich in androgen receptors, which are highly sensitive to changes in the body’s hormonal balance. Stress, menstrual cycles, and life changes common in one’s late 20s and 30s can trigger an overproduction of oil in these specific glands, leading to the cystic, often painful, acne that characterizes adult hormonal breakouts.
Understanding this root cause is critical for effective management and coverage. Because this type of acne is inflammatory and sits deep within the skin, trying to cover it with heavy, drying makeup is a losing battle. It will only emphasize texture and can exacerbate the problem. The professional approach is strategic and gentle. It’s not about hiding, but about skillfully deflecting attention while treating the area.
The first step is to use a primer infused with salicylic acid exclusively on the jawline to treat the area while creating a smooth canvas. When concealing, use a lightweight, hydrating concealer and apply it with stippling motions, never rubbing. For particularly red or angry cysts, a touch of color corrector (green or yellow tones) *before* the concealer can neutralize the redness without adding bulk. Finally, create a focal point elsewhere on the face—a slightly more defined brow or a touch of color on the lips can draw the eye upward and away from the jawline, creating a polished look that exudes confidence.
Why Empire Waists Often Make Apple Shapes Look Boxy?
In fashion, an ill-fitting garment like an empire-waist dress on an apple-shaped body can create a “boxy” or shapeless silhouette. This same principle applies directly to makeup. An untailored makeup application—one that doesn’t respect the unique architecture of a face—can make features look flat, undefined, and “boxy,” especially on camera. Just as we use clothing to create flattering lines, we must use makeup to create dimension and lift. This has become even more critical in our modern work environment. As corporate trainer Jennifer Brick notes, “Since 2020, the formality of how we show up at work has decreased,” which places more emphasis on a polished face to convey professionalism.
The makeup equivalent of a “boxy” dress is a single, flat layer of foundation applied from hairline to jawline. It erases the natural shadows and highlights of the face, creating a mask-like effect that is particularly unflattering under the harsh, one-dimensional lighting of a video call. The solution is the ‘Vertical Lift’ strategy, a quick contouring and highlighting technique designed to restore dimension in under a minute.
Case Study: The ‘Vertical Lift’ Makeup Strategy
The goal is to counteract the flattening effect of screens and create a more polished, professional appearance. Professional stylist demonstrations have shown that by using a matte bronzer or contour a shade or two darker than your skin, you can create a subtle “3” shape along the perimeter of the face: from temple, under the cheekbone, and along the jawline. Then, by strategically highlighting the center of the face (a touch on the forehead, down the bridge of the nose, and on the chin), you create an illusion of vertical lift. This technique pulls the focus inward and upward, sculpting the face and ensuring you look defined and dynamic, not flat and boxy.
This isn’t about heavy, Instagram-style contouring. It’s a whisper of product, expertly placed, to bring back the structure that a single layer of base makeup can erase. It’s the tailoring your face needs to look sharp and three-dimensional in any professional setting.
To Remember
- Technique over quantity is the mantra for a fast, professional finish.
- Texture is everything: Creams for glow, powders pressed (not swiped), and correctors for targeted work.
- Adapt your application for a “digital-first” world; what looks good on camera is the new standard for work.
How to Manage Hormonal Acne in Your 30s Without Drying Out Aging Skin?
Entering your 30s presents a unique dermatological challenge: the dual concern of managing hormonal acne while simultaneously addressing the first signs of aging, such as fine lines and drier skin. The harsh, stripping acne treatments of your youth are now your enemy, as they can parch maturing skin, emphasizing texture and making you look older. A successful “no-makeup” look in this decade hinges on a delicate balance: providing enough coverage to conceal blemishes without using heavy, matte formulas that settle into lines and dehydrate the skin.
The key is a dual-concern base application. This means you don’t treat your entire face as a single canvas. Instead, you customize your prep and product choice by zone. Start by applying a hydrating, lightweight primer on areas prone to dryness or fine lines, such as around the eyes and on the forehead. Then, use a non-drying, gripping primer specifically on the acne-prone zones, like the chin and jawline, to create a smooth surface that helps makeup adhere without irritating breakouts. This targeted prep is the most critical step.
When it comes to coverage, ditch traditional matte concealers. Opt for modern serum concealers, which are infused with hydrating ingredients like hyaluronic acid. They offer buildable coverage for blemishes but have a natural, skin-like finish that won’t cake or dry out. Apply concealer with precise stippling motions using a small, dense brush, then use the warmth of your finger to gently melt the edges. This approach ensures blemishes are covered, but your skin maintains a healthy, hydrated glow—a sophisticated solution that speaks to both confidence and competence, which can be crucial, as some economic analysis reveals up to 20% higher incomes for attractive individuals. It’s not about vanity; it’s about presenting your best, most confident self.
Elevate your morning routine from a chore to a strategy. Start by mastering one of these techniques and see the immediate impact on your professional presence.