
Getting a clean shot of the Taj Mahal is not about luck; it’s a multi-layered logistical operation that systematically removes crowds through planning, gear, and technique.
- Strategic timing and entry point selection are more critical than any other factor.
- Mastering long exposures with ND filters and using telephoto lens compression are the two key technical skills for erasing people from the frame.
Recommendation: Shift your mindset from ‘finding’ a clear shot to ‘creating’ one by actively controlling every element within your frame.
For any travel photographer, it’s the ultimate challenge: capturing the serene beauty of the Taj Mahal, a monument to love, without the visual noise of the 20,000 people who visit it daily. Most guides offer the same platitude: “go early.” While true, this advice is woefully incomplete. It ignores the operational logistics, the technical mastery, and the compositional cunning required to truly create a clean, powerful image of this world wonder. Getting that shot isn’t just about showing up before the tour buses arrive; it’s about executing a deliberate plan.
This isn’t a tourist’s guide. This is a photographer’s operational plan. We will move beyond the basics and into the specific strategies that separate an amateur snapshot from a professional photograph. Forget hoping for an empty moment. We’re going to engineer one. This guide will break down the entire process, from pre-dawn logistical planning and strategic gear choices to advanced compositional techniques and the final, ethical polish in post-processing. We’ll explore how to control the frame and systematically deceive the viewer into believing you had the entire complex to yourself.
This article provides a complete strategic blueprint for your photographic mission. Below is a summary of the key operational phases we will cover to ensure you walk away with an image worthy of your portfolio.
Table of Contents: A Strategic Guide to a Crowd-Free Taj Mahal
- The Strategic Waiting Game: Why Pre-Dawn is Your Best Ally
- How to Use ND Filters to “Erase” Moving Crowds From Photos?
- Wide Angle or Telephoto: Which Compresses Backgrounds to Hide People?
- The Perspective Mistake That Makes Your Travel Photos Look Like Postcards
- Which Gate to Enter First: Beating the Tour Buses at Historical Sites
- Beyond the Main Axis: Finding Unseen Vantage Points
- The Art of Misdirection: Using Framing to Conceal Crowds
- The Final Polish: Ethical Cloning and Editing for a Flawless Frame
The Strategic Waiting Game: Why Pre-Dawn is Your Best Ally
The most valuable currency at the Taj Mahal is time, specifically the minutes between the gates opening and the first wave of general tourists arriving. This is not simply about “golden hour”; it’s a strategic race against the sun and the crowds. Your operation begins in the dark. The goal is to be at the front of the queue, not just to get in first, but to maximize the 15-20 minutes of relative solitude you might have. During this window, the light is soft, ethereal, and the grounds are as empty as they will ever be.
This pre-dawn commitment changes the entire dynamic. While others are waking up, you are already in position, capturing the iconic reflection shot with minimal ripples in the water and clean lines in the gardens. This requires more than just an early alarm. It means having your gear prepped, your camera settings approximately dialed in, and a clear shot list in your mind. The aim is to work efficiently, capturing your wide, establishing shots before the sun gets too harsh and the grounds fill up.
However, be aware of seasonal factors. The infamous Agra winter fog can completely obscure the monument until mid-morning. In these conditions, the “go early” rule can backfire. A savvy photographer checks local weather patterns and is prepared to pivot. Sometimes, the best light isn’t at dawn but during the “silver hour” just after the fog begins to lift, creating a moody, atmospheric scene that is far more unique than the classic blue-sky shot. Your timing strategy must be adaptable.
How to Use ND Filters to “Erase” Moving Crowds From Photos?
When the crowds inevitably arrive, your strategy must shift from avoiding people to actively removing them from the frame using technical skill. The most powerful tool for this is the Neutral Density (ND) filter. By reducing the amount of light entering your lens, an ND filter allows you to use a much longer shutter speed, even in broad daylight. This technique, known as long exposure, is the secret to making moving objects, like walking tourists, vanish into a soft blur or disappear entirely.
The key is a shutter speed long enough that any single person doesn’t remain in one spot for a significant portion of the exposure. Anything from 30 seconds to several minutes can work. This brings a major logistical challenge: tripods are strictly forbidden inside the Taj Mahal complex. You must find a stable surface—a ledge, a bench, or even your camera bag placed firmly on the ground—to keep your camera perfectly still. A 10-stop or 15-stop ND filter is typically required to achieve these long shutter speeds during the day. Set your ISO to its lowest native setting (e.g., 100) and your aperture to a mid-range like f/8 or f/11 for sharpness.
Case Study: The Power of Extreme Long Exposure
To understand the dramatic effect of this technique, consider a real-world test conducted at a busy tourist intersection. Without a filter, the fastest shutter speed achievable was only 1/8th of a second, freezing all the unwanted movement. However, by adding a 15-stop ND filter, the photographer could extend the exposure time. An initial 8-minute exposure still showed some traffic trails, but a 14-minute exposure at f/16 proved effective, blurring the moving elements into non-existence. This demonstrates that for a location as busy as the Taj Mahal, a longer exposure is always better for complete erasure.
This method requires patience. You’ll need to take multiple shots, as people who stand still for too long will still appear as ghosts in your frame. The goal is to capture an exposure where the flow of people was constant, allowing the camera’s sensor to average them out of the scene. It’s a form of photographic magic that allows you to create an illusion of perfect solitude.
Wide Angle or Telephoto: Which Compresses Backgrounds to Hide People?
Your choice of lens is a critical tool for frame control. It’s not just about what you include, but how you present the spatial relationship between your subject and its surroundings. Both wide-angle and telephoto lenses have distinct roles in your operational plan to combat crowds. A wide-angle lens (e.g., 14-24mm) is essential for capturing the grand scale of the monument, especially in those first few empty moments after the gates open. It allows you to get close to a foreground element, like the edge of the reflecting pool, and make the Taj Mahal feel immense and epic.
However, the real secret weapon for dealing with crowds is the telephoto lens (e.g., 70-200mm or longer). A telephoto lens compresses the background, making distant objects appear closer. This effect is incredibly powerful for isolating details of the monument and “hiding” the crowded grounds. By zooming in on a specific architectural element—a minaret, the central dome, or the intricate marble inlay—you can fill your frame with the beauty of the structure itself, leaving no room for the distracting throngs of people below. This technique of architectural abstraction is your most reliable method for getting a guaranteed clean shot at any time of day.
The following table, based on an in-depth analysis of lens choices, breaks down the strategic application for each lens type.
| Lens Type | Focal Length | Crowd Management Technique | Best Use Case |
|---|---|---|---|
| Wide Angle | 14-24mm | Captures full structure, requires careful positioning | Early morning empty scenes, upward angles |
| Standard | 50mm | Balanced perspective for details | Architectural details, calligraphy |
| Telephoto | 200mm+ | Isolates specific details, compresses background | Crowd-proof architectural elements |
As the illustration shows, a telephoto lens lets you transform a chaotic scene into a serene, detailed study. Instead of fighting the crowds, you simply crop them out with your optics. This approach shifts your focus from capturing the “whole thing” to capturing the most beautiful parts of it, which often results in a more intimate and compelling photograph.
The Perspective Mistake That Makes Your Travel Photos Look Like Postcards
The single biggest mistake photographers make at the Taj Mahal is shooting from eye-level, standing dead-center in front of the reflecting pool. This is the “postcard shot.” It’s the default, the expected, and the most unoriginal perspective you can choose. As one guide bluntly puts it:
You end up with the same photo approximately 8 million people take of the Taj Mahal every year.
– TravelPixelz Photography Guide, Photography Guide to the Taj Mahal
To create a truly compelling image, you must actively fight this instinct. An original photograph comes from an original perspective. This means physically moving your camera away from the default position. Get low to the ground to exaggerate reflections or use foreground elements. Move to the side gardens to find new leading lines. Shoot upwards to emphasize the scale of the minarets against the sky. The goal is to break the symmetry in a deliberate and interesting way.
This isn’t just about being different for the sake of it; it’s a practical crowd-control strategy. The central axis is where 99% of visitors congregate. By moving just 50 feet to the left or right, into the gardens or near the side buildings (the mosque and the guesthouse), you not only find a more unique composition but also a less populated area. You can use trees, archways, and other people as framing elements to create depth and context, turning a potential distraction into an integral part of your story.
Action Plan: Your Anti-Postcard Shot Audit
- Audit Main Axis: First, ask yourself: is my camera positioned on the central walkway? If yes, this is your signal to immediately move.
- Inventory Framing Elements: Scan your surroundings for natural frames. Identify arches from the main gate (Darwaza-i-Rauza), trees in the side gardens, or the silhouettes of the flanking buildings.
- Evaluate Vantage Point: Deliberately change your elevation. Crouch down low to the ground to change the reflection’s perspective or find a raised platform for a slightly higher view.
- Check for Alternative Reflections: Instead of the main, crowded reflecting pool, look for smaller, temporary puddles after rain or the narrow water canals running along the pathways.
- Integrate a Foreground Subject: Find a patch of flowers, an interesting paving stone, or an architectural detail to place in your immediate foreground, creating a sense of depth that the flat postcard shot lacks.
Which Gate to Enter First: Beating the Tour Buses at Historical Sites
Your photographic success at the Taj Mahal is decided before you even see the monument. It’s won at the ticket counter. Understanding the logistical flow of crowds is paramount. Of the three entry gates—West, East, and South—the East gate is widely considered the best option for photographers aiming to be first inside. The West gate is the main entrance, used by most local tourists and large groups, making it the most crowded. The South gate opens later, so it’s not an option for a dawn mission. The East gate, typically used by foreign tourists staying at nearby hotels, generally has shorter queues in the pre-dawn hours.
Field Report: The East Gate Strategy
An effective ground strategy is to arrive at the East gate ticket office at least 30-45 minutes before sunrise. As noted in detailed field guides, the East gate consistently has the least crowds at opening time. Crucially, the ticket office is a 10-15 minute walk from the actual security gate, a delay many first-timers don’t account for. The pro tip is to buy your ticket and move to the security line immediately. Do not waste precious minutes hiring a guide or collecting an audio guide; that can be done later. Your only priority is being one of the first people through the gate when it opens.
This logistical advantage is compounded by understanding peak seasons. While not always possible to choose your travel dates, being aware of crowd density can help manage expectations. According to official data from the Taj Mahal authorities, the peak tourist months are October, November, and February. Traveling just outside these windows can make a significant difference. However, a well-executed gate strategy can give you a crucial advantage even on the busiest days.
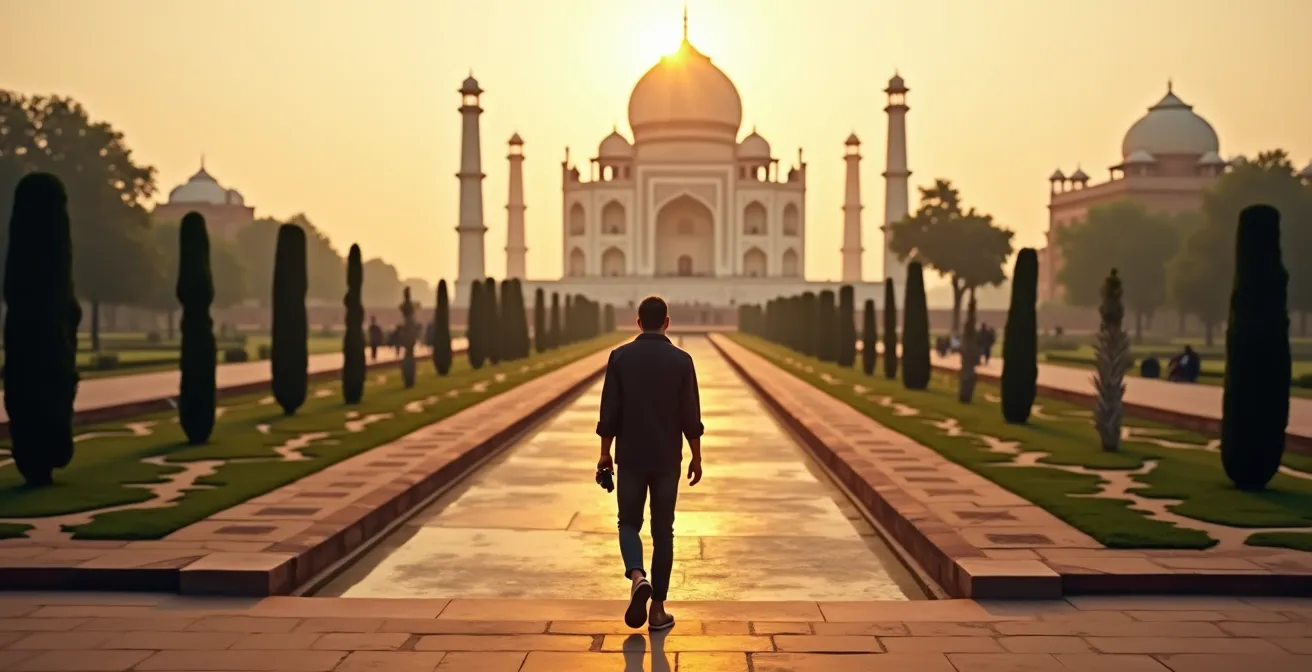
The result of a successful gate strategy is a scene like this: the iconic gardens, bathed in perfect morning light, completely devoid of people. This is the prize for your logistical planning. It’s a fleeting moment, but it’s the moment that makes the entire effort worthwhile.
Beyond the Main Axis: Finding Unseen Vantage Points
Once you’ve captured your initial shots from the central axis during the early morning lull, it’s time to execute the next phase of your plan: disappearing from the crowds. The vast majority of visitors stick to the main paved pathways leading directly to the mausoleum. Your objective is to explore the periphery. The Taj Mahal complex is much larger than just the main building, and its flanking structures and gardens are a goldmine of unique, crowd-free vantage points.
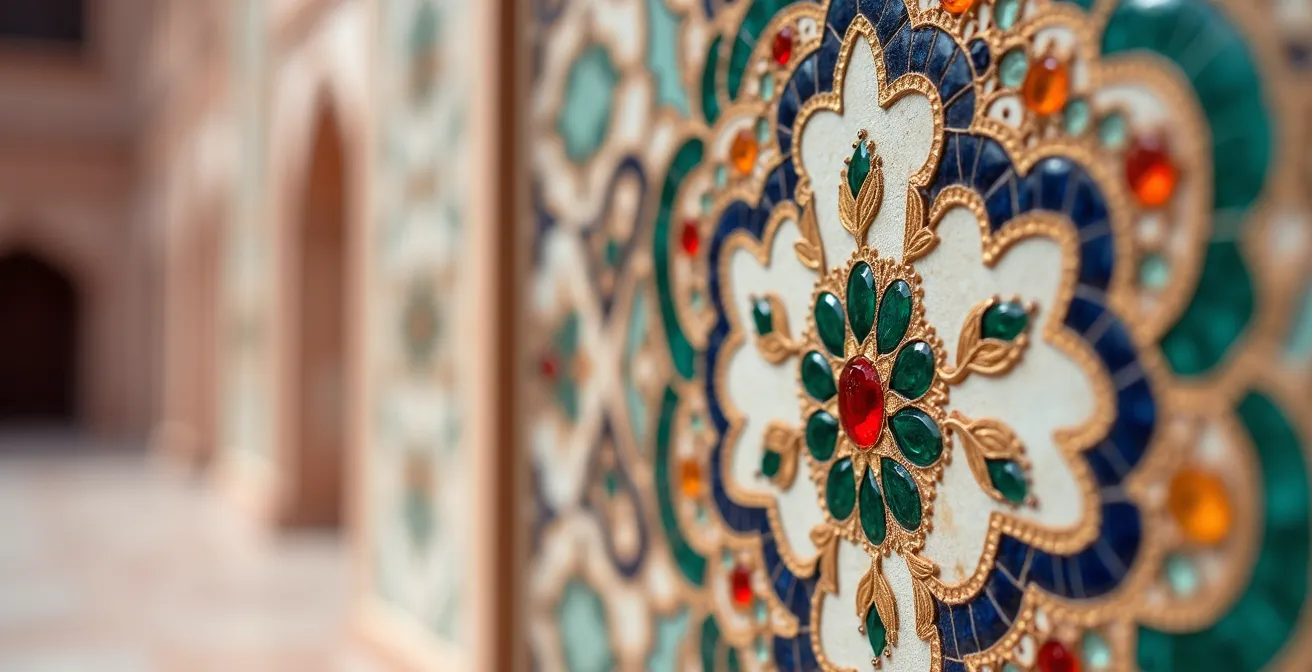
Head towards the two identical red sandstone buildings on either side of the Taj: the mosque (on the west) and the Mihman Khana or guesthouse (on the east). The arched doorways and windows of these buildings serve as magnificent natural frames. By shooting the Taj Mahal *through* these arches, you create a powerful sense of depth and place, while conveniently using the architecture to block out the crowds in the main area. The side-on view of the Taj from these platforms is also far less common and can reveal beautiful details in the marble as the light changes.
Don’t neglect the gardens. The formal Charbagh garden is laid out in a geometric grid with walkways and water channels. Instead of staying on the main central path, explore the perpendicular paths. This allows you to use the rows of trees and fountains as leading lines, creating compositions that feel more organic and less staged. Look for low angles, shooting across the manicured lawns to capture a sliver of the monument peeking over the greenery. These alternative spots are not only less crowded but also offer a more intimate and personal perspective on the iconic structure.
The Art of Misdirection: Using Framing to Conceal Crowds
As the day progresses and crowds become unavoidable, your compositional strategy must become more deliberate and, in a sense, deceptive. If you can’t find an empty scene, you must create one through the art of framing and misdirection. This is about using elements within the environment to strategically hide or obscure the busiest parts of the complex. It’s a more active form of composition than simply finding a good vantage point; it’s about selective concealment.
Look for foreground elements you can get very close to. A leafy tree branch, a section of an ornate wall, or the edge of a fountain can be used to fill a portion of your frame. By positioning yourself so that this foreground element blocks the main walkway or the crowded plaza in front of the mausoleum, you can create an image that feels serene and isolated, even if chaos is reigning just outside your frame. Using a wider aperture (e.g., f/2.8 or f/4) can help blur the foreground, making it a soft, unobtrusive framing device.
Another powerful technique is to use people themselves as compositional elements rather than distractions. Instead of trying to get a completely empty shot, create a sense of scale and life by including one or two individuals. A woman in a colorful sari walking down a side path, or a groundskeeper tending to the gardens, can add a human element that tells a story. The key is intentional inclusion. By using a telephoto lens to isolate a single person against the grand backdrop of the monument, you control the narrative and turn a potential problem—the presence of people—into a compositional strength.
Key Takeaways
- Success is logistical: A crowd-free shot is engineered through planning (gate choice, timing) not discovered by chance.
- Master technical removal: Use long exposures with ND filters and telephoto compression to actively erase or hide crowds from the frame.
- Abandon the postcard shot: The most valuable compositions are found by moving off the central axis and exploring unique angles and frames.
The Final Polish: Ethical Cloning and Editing for a Flawless Frame
No matter how well you plan and execute your shoot on-site, there will often be a few stubborn distractions in your best shots: a stray tourist who stood still too long, a piece of litter, or a security guard in an awkward position. The final phase of your operation takes place in the digital darkroom. Post-processing is not about faking a shot you didn’t get; it’s about refining the shot you so carefully crafted, removing the final 5% of imperfections to realize your vision.
The primary tools for this job are the Clone Stamp and the Healing Brush in software like Adobe Photoshop or Lightroom. The key to using these tools effectively and ethically is subtlety. Your goal is not to create a fantasy image, but to clean up minor blemishes. For removing a person, the best practice is to take multiple shots from the exact same position on-site. This technique, known as “stacking,” allows you to layer the images in Photoshop and simply mask out the person in one frame, revealing the clean background from another frame underneath. This is the most authentic way to “remove” people.
When you don’t have multiple frames to stack, the Clone Stamp tool is your next resort. Use a small, soft-edged brush and sample textures from adjacent areas to paint over the unwanted object. Be meticulous. Pay close attention to light, shadow, and texture to ensure the edit is invisible. The goal is a final image that looks completely natural and believable, upholding the integrity of the moment you captured. This final polish is what elevates a great shot to a perfect one.
By combining logistical planning, technical mastery in-camera, and a subtle hand in post-processing, you can consistently produce stunning, crowd-free images of the Taj Mahal that stand out from the millions of snapshots taken every year. Your final step is to apply this operational mindset to your own photographic missions.