In summary:
- Stop all exfoliation (acids, scrubs, retinoids) immediately and switch to a minimal, barrier-focused routine.
- Focus on “rebuilding the mortar” of your skin with ingredients like ceramides, cholesterol, and fatty acids.
- Use a gentle, pH-balanced cleanser that doesn’t leave your skin feeling tight or “squeaky clean.”
- Protect your healing skin with occlusives like petrolatum (“slugging”) at night and a mineral sunscreen during the day.
- Be patient; true barrier recovery is about creating a calm, supportive environment for your skin to heal itself, which can take several weeks.
That tight, stinging, and persistent redness after using your favorite acid toner a little too enthusiastically is more than just irritation. It’s a distress signal. Your skin’s moisture barrier, the diligent gatekeeper responsible for keeping moisture in and pollutants out, has been compromised. Many guides will tell you to simply “stop exfoliating” or “use gentle products,” but this advice often feels vague when your face is actively protesting. You’re left wondering which ingredients truly heal and which are just hype.
The common reaction is to either do nothing or, conversely, to throw a dozen “soothing” products at the problem, potentially causing more chaos. The truth is, healing a damaged barrier isn’t about adding more; it’s about a strategic retreat. It requires you to stop thinking about treating individual problems like acne or fine lines and start thinking like a skin architect, focused on rebuilding your skin’s fundamental protective structure. The key isn’t just to stop the damage, but to actively supply the raw materials for reconstruction.
This guide will walk you through that gentle, reparative process. We won’t just list products; we’ll explain the science behind why your skin is reacting this way and provide a clear, step-by-step framework for rebuilding its resilience. We will explore the structural importance of lipids, demystify the roles of different hydrating ingredients, and offer a simple, two-step routine to bring your skin back to a state of calm and health.
To help you navigate this healing journey, this article covers the essential pillars of barrier repair. The following sections will guide you from understanding the initial warning signs to implementing a full recovery and maintenance plan.
Summary: A Guide to Rebuilding Your Skin Barrier
- Why “Squeaky Clean” Skin Is Actually a Cry for Help?
- How to “Slug” with Petrolatum Without Clogging Pores?
- Ceramides or Hyaluronic Acid: Which Actually Fixes the Barrier?
- The Shower Mistake That Strips Lipids From Your Face Instantly
- Problem & Solution: Simplifying Your Routine to Just 2 Steps for Recovery
- The “Nuclear Option” Mistake That Makes Acne Worse
- HEPA or Ionizer: Which Is Safer for Asthma Sufferers?
- How to Manage Hormonal Acne in Your 30s Without Drying Out Aging Skin?
Why “Squeaky Clean” Skin Is Actually a Cry for Help?
For decades, we’ve been conditioned to associate a “squeaky clean” feeling with effective cleansing. That tight, dry sensation was marketed as proof that all the dirt and oil were gone. In reality, that feeling is the sound of your skin’s protective lipid matrix being systematically stripped away. A healthy skin barrier is naturally acidic, with a pH between 4.5 and 5.5. This “acid mantle” is crucial for fending off harmful bacteria and retaining moisture. Many traditional foaming cleansers are highly alkaline, which violently disrupts this delicate balance.
When you use a harsh cleanser, it doesn’t just remove makeup and grime; it emulsifies and washes away the essential ceramides, cholesterol, and fatty acids that form the “mortar” between your skin cells. This is the first step in creating a compromised barrier. The “squeak” is the friction of your fingers against skin that has been stripped of its natural lubrication. It’s not a sign of cleanliness, but a sign of vulnerability. The immediate consequence is dehydration, and over time, this leads to a cascade of inflammation, including redness, sensitivity, and even an overproduction of oil as your skin desperately tries to compensate for the dryness.
Switching to a gentle, pH-balanced cleanser is the single most important foundational step in barrier repair. Look for creamy, non-foaming formulas that cleanse without stripping. Your skin should feel soft, comfortable, and hydrated after washing—never tight. This simple switch stops the daily assault on your barrier, giving it the chance it needs to begin the healing process.
How to “Slug” with Petrolatum Without Clogging Pores?
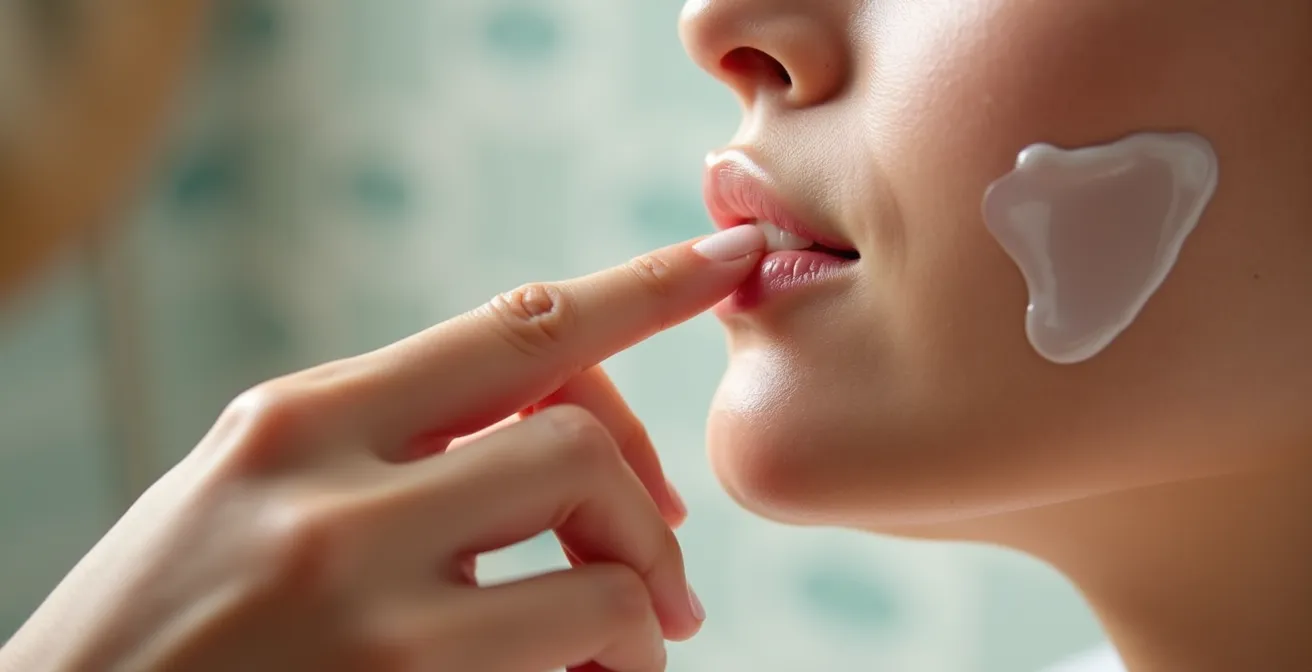
The term “slugging” has taken social media by storm, but the practice itself is a long-standing dermatological secret for barrier repair. It involves applying a thin layer of an occlusive agent, most commonly petrolatum (like Vaseline), as the final step in your nighttime routine. Its function is simple but powerful: it creates a protective cocoon over your skin, drastically reducing transepidermal water loss (TEWL) overnight. This keeps the skin’s natural moisture locked in and protects it from external irritants, creating an ideal environment for healing.
The fear of clogged pores is understandable, but it’s largely based on a misunderstanding of how petrolatum works. Petrolatum is non-comedogenic, meaning the molecule itself is too large to enter and block your pores. Breakouts from slugging are typically caused by trapping bacteria or other comedogenic ingredients *underneath* the occlusive layer. The key to safe slugging is preparation. Always apply it to a thoroughly cleansed face, over your hydrating serums or moisturizers. This ensures you are sealing in beneficial moisture, not pore-clogging debris.
For those with compromised barriers, a strategic approach is best. You don’t need to coat your entire face. Focus the application on the driest, most irritated areas where the barrier is most damaged. This targeted method provides the healing benefits exactly where they’re needed without overwhelming areas that are less affected.
Case Study: The Safe Slugging Protocol
One beauty editor documented her experience repairing a severely damaged barrier in just seven days using this strategic approach. She applied only a pea-sized amount of petrolatum to the flaky, sensitive patches on her cheeks and around her nose after cleansing and applying hydrating serums. She completely avoided her typically oily T-zone. The result was a dramatic reduction in flaking and sensitivity, allowing her skin to heal without experiencing any new breakouts.
Ceramides or Hyaluronic Acid: Which Actually Fixes the Barrier?
In the world of hydration, hyaluronic acid (HA) has long been the reigning champion, famous for its ability to hold up to 1000 times its weight in water. It’s an excellent humectant, drawing moisture into the skin and giving it a plump, hydrated appearance. However, when it comes to *repairing* a broken barrier, HA is more of a supportive player than the lead actor. Think of it as bringing water to a construction site with a leaky bucket; it’s helpful, but it doesn’t fix the fundamental leak.
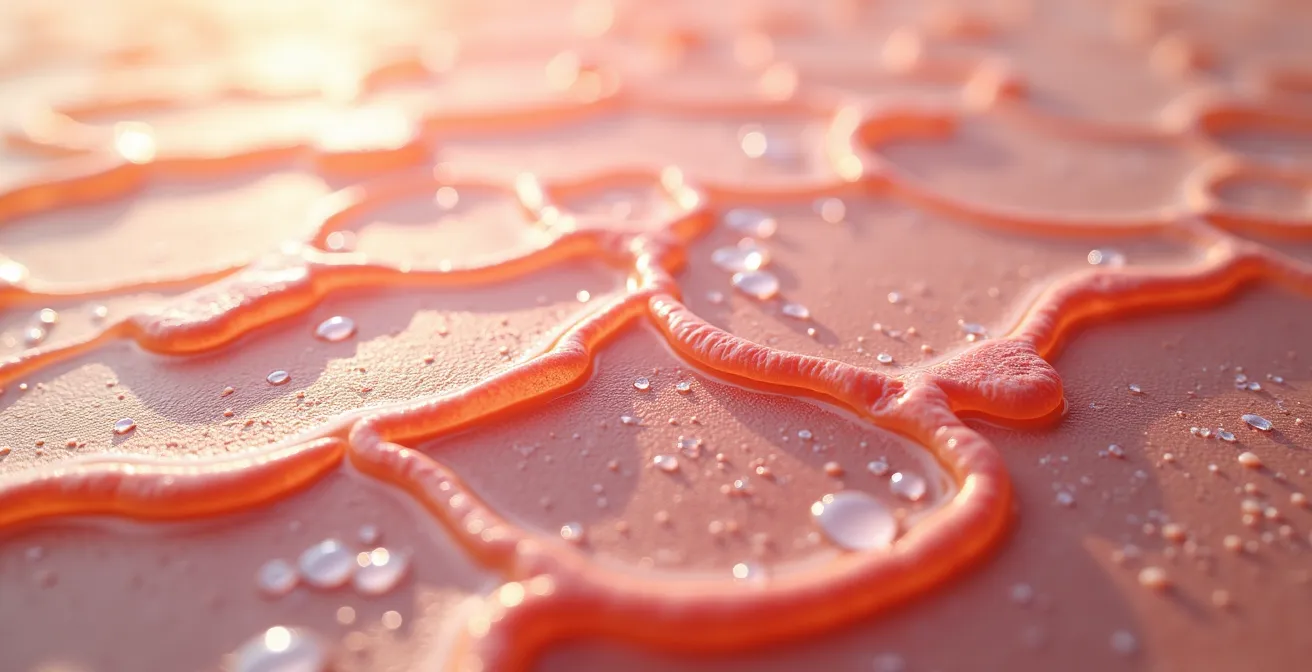
The real heroes of barrier repair are ceramides. These lipids are a natural and essential component of your skin’s structure. If your skin cells are the “bricks,” ceramides are the “mortar” that holds them together, forming a cohesive, protective wall. A damaged barrier is, by definition, deficient in these lipids. Over-exfoliation and harsh cleansers wash this mortar away, leaving gaps in the wall that allow moisture to escape and irritants to enter. Applying ceramides topically helps to directly replenish this depleted mortar, rebuilding the barrier’s structural integrity from the outside in.
This isn’t to say hyaluronic acid is useless. For dehydrated skin with a relatively intact barrier, it’s fantastic. But for a truly compromised, stinging barrier, prioritizing ceramides is crucial for the actual reconstruction. In fact, Dr. Heather D. Rogers, a leading dermatologist, highlights the importance of a specific lipid combination for optimal healing. As she states in a scientific review for her skincare line:
The optimal ratio of 3:1:1 (Ceramides:Cholesterol:Fatty Acids) has been shown to accelerate barrier recovery by 300% compared to single ingredients.
– Dr. Heather D. Rogers, MD, Doctor Rogers Skin Care Scientific Review
This underscores that a comprehensive lipid blend is the most effective way to mend the gaps in your skin’s defenses. The table below, based on a comparative analysis of skin barrier ingredients, clarifies their distinct roles.
| Aspect | Ceramides | Hyaluronic Acid |
|---|---|---|
| Primary Function | Structural repair (mortar) | Hydration (water retention) |
| Barrier Impact | Direct reconstruction | Indirect support |
| Best For | Severely damaged barriers | Dehydrated but intact barriers |
| Application Order | Apply first for repair | Apply after barrier stabilizes |
| Scientific Evidence | 50% of stratum corneum composition | Holds 1000x its weight in water |
The Shower Mistake That Strips Lipids From Your Face Instantly
You step out of a long, hot shower feeling relaxed and clean. You towel off, get dressed, and maybe check a few emails before finally getting to your skincare routine. In that short span of time, a critical window for preserving your skin’s moisture has slammed shut. Hot water is incredibly effective at dissolving the natural lipids in your skin, leaving your barrier vulnerable the moment you turn off the tap. What happens next is crucial.
As the air hits your damp skin, evaporation begins immediately, pulling moisture not just from the surface but from the deeper layers of your skin—a process known as transepidermal water loss (TEWL). Your freshly weakened barrier is unable to prevent this mass exodus of hydration. The longer you wait to apply moisturizer, the more moisture is lost. In fact, clinical research shows that transepidermal water loss increases by 25% after just 60 seconds post-cleansing. Waiting five or ten minutes can leave your skin significantly more dehydrated than before you showered.
To prevent this, two simple adjustments are necessary. First, turn down the temperature. Use lukewarm water on your face, never hot. It’s far less stripping and just as effective for cleansing. Second, and most importantly, apply your first hydrating product (a serum or moisturizer) to damp skin within 60 seconds of patting your face dry. This “golden minute” is your opportunity to lock in the surface hydration from the shower before it evaporates, using your products to trap the moisture and support your healing barrier.
Problem & Solution: Simplifying Your Routine to Just 2 Steps for Recovery
When your skin is in crisis mode—red, stinging, and reactive—the instinct can be to pile on products labeled “calming” or “soothing.” But a compromised barrier has a very low tolerance for activity. Even beneficial ingredients can become irritants when the skin’s defenses are down. Introducing multiple new products at once also makes it impossible to identify the source of any further irritation. The solution is radical simplicity: a barrier-conscious routine stripped down to the bare essentials.
For a period of 2 to 4 weeks, your entire skincare routine should be focused on two core functions: cleansing gently and moisturizing to rebuild. This means pausing all active ingredients—no vitamin C, no retinoids, no exfoliating acids, and no scrubs. Your skin’s finite energy needs to be directed entirely toward healing, not processing a cocktail of potent ingredients. By removing all potential aggressors, you create a peaceful environment where the skin can focus on reconstruction. This minimalist approach not only promotes physical healing but also provides significant mental relief from the complex, multi-step routines that may have contributed to the problem in the first place.
After years of 10-step routines, I stripped everything back to just cleansing and moisturizing. Within 2 weeks, my chronic redness disappeared, and products that used to sting now absorb beautifully. The mental relief from simplifying was as healing as the physical results.
– Minimalist Recovery Success Story, The Inkey List
Adopting this pared-back philosophy is the fastest path back to equilibrium. It allows your skin to reset and gives you a clean slate from which you can slowly and carefully re-introduce other products once your barrier is strong and resilient again.
Your Barrier Recovery Action Plan
- AM Step 1: Rinse with lukewarm water only. No cleanser is needed in the morning, as this preserves the lipids your skin produced overnight.
- AM Step 2: Apply a barrier-supporting mineral sunscreen. Look for formulas with added ceramides or niacinamide.
- PM Step 1: Cleanse with a gentle, pH-balanced cream or gel cleanser. A single cleanse is sufficient.
- PM Step 2: While skin is still damp, apply a dedicated barrier repair cream, ideally one containing the 3:1:1 ratio of ceramides, cholesterol, and fatty acids.
- Track Your Progress: Keep a simple journal, rating redness, tightness, and comfort on a scale of 1-5 daily. This helps you objectively see the improvement over 4 weeks.
The “Nuclear Option” Mistake That Makes Acne Worse
For those struggling with acne, the temptation to declare all-out war on breakouts is strong. This often involves a “nuclear option” approach: a multi-front attack with harsh cleansers, high-concentration benzoyl peroxide, salicylic acid, and drying spot treatments, all used simultaneously. While the intent is to obliterate acne, this aggressive strategy almost always backfires by obliterating your skin’s microbiome and lipid barrier first. This scorched-earth tactic creates a new, more complex problem: inflamed, angry skin that is now too compromised to heal properly, leading to more persistent acne and post-inflammatory marks.
A healthy skin barrier is home to a diverse ecosystem of microorganisms, a community known as the skin microbiome. This microbiome plays a critical defensive role, helping to regulate inflammation and keep pathogenic bacteria, like the acne-causing *C. acnes*, in check. The nuclear option approach indiscriminately wipes out both good and bad bacteria, creating a state of dysbiosis. This imbalance allows the more resilient, pro-inflammatory microbes to flourish, often making acne worse and more inflamed than before. In fact, emerging dermatological research shows that probiotic treatments reduced acne lesions by up to 40% in clinical trials, highlighting the importance of supporting, not destroying, your skin’s natural ecosystem.
A far more effective strategy is to sign a peace treaty with your skin. This involves focusing on barrier support as the primary goal and using acne treatments as targeted, precise tools rather than widespread weapons. A clinical study tracking acne patients who switched from aggressive multi-active routines to barrier-supportive ones (using spot treatments only as needed) found that 70% saw improvement in both acne and overall skin health within six weeks. By calming inflammation and restoring the barrier, the skin becomes more resilient and better equipped to manage breakouts on its own.
HEPA or Ionizer: Which Is Safer for Asthma Sufferers?
While the question of HEPA filters versus ionizers is most often discussed in the context of respiratory health and asthma, the underlying principle is deeply relevant to anyone with a compromised skin barrier. Your skin is your body’s largest organ and its first line of defense against the environment. When that defense is weakened, it becomes highly susceptible to environmental aggressors, including the very same airborne particles that trigger respiratory issues.
Pollutants, dust, pollen, and other microscopic particulates floating in the air can land on the skin and provoke an inflammatory response. For healthy skin, this is rarely an issue. But for a barrier that is already damaged and inflamed, these particles act like salt in a wound, increasing redness, itching, and sensitivity. This constant environmental stress can significantly slow down the healing process. Creating a clean, low-irritant environment is therefore a supportive, if often overlooked, part of a barrier repair strategy.
This is where air filtration becomes a skincare tool. HEPA (High-Efficiency Particulate Air) filters are the gold standard for creating this clean-air sanctuary. By mechanical filtration, they are designed to capture microscopic particles with extreme efficiency. In fact, environmental health studies confirm HEPA filters reduce airborne irritants by 99.97%. Placing a HEPA filter in your bedroom can significantly reduce the particulate load on your skin overnight, giving your healing barrier a much-needed break from environmental assault. This allows your topical products to work more effectively in a calm, controlled setting.
Key Takeaways
- True barrier repair is an act of reconstruction, not just pacification. It requires supplying the skin with its core building blocks: ceramides, cholesterol, and fatty acids.
- Simplify to amplify. A minimal routine of gentle cleansing and barrier-focused moisturizing is the fastest path to calming inflammation and allowing the skin to heal itself.
- Your environment matters. From the water temperature in your shower to the air quality in your home, reducing external stressors is a critical, often overlooked, component of recovery.
How to Manage Hormonal Acne in Your 30s Without Drying Out Aging Skin?
Navigating hormonal acne in your 30s and beyond presents a unique challenge. The very treatments that are effective for acne, such as retinoids, are also notoriously drying and can be harsh on aging skin that is naturally becoming drier and more delicate. Furthermore, using them aggressively can easily trigger the very barrier damage you are trying to heal. The key to success is not to avoid these powerful ingredients, but to implement them with a barrier-conscious strategy that respects the skin’s new rules.
The “retinoid sandwich” technique is a perfect example of this balanced approach. It involves buffering the retinoid between two layers of moisturizer. You apply a layer of moisturizer to clean, dry skin, wait a few minutes, apply your retinoid, wait again, and then apply a final layer of moisturizer. This method doesn’t dilute the efficacy of the retinoid but slows its penetration, significantly reducing the potential for irritation, peeling, and barrier disruption. A dermatological study found that 85% of patients in their 30s using this method were able to maintain consistent tretinoin use, achieving both acne clearance and anti-aging benefits without compromising their skin barrier.
Once your barrier is fully repaired and stable (a process that can take 4-8 weeks), you can begin to slowly re-introduce multitasking ingredients. Start with less aggressive options like niacinamide to help with redness and sebum regulation. Then, when you feel ready to incorporate a retinoid, do it slowly. Start by using the sandwich technique just twice a week, and only increase the frequency if your skin remains calm and comfortable. This “low and slow” approach allows you to reap the benefits of powerful actives while making barrier health the non-negotiable priority, ensuring your skin remains balanced, clear, and resilient.
Now that your skin barrier is on the path to recovery, the next logical step is to establish a long-term maintenance routine that preserves its newfound resilience. The principles of gentle handling and targeted treatment should become the foundation of your daily skincare philosophy.